

Gift Box Preference Form Setup Guide
A gift-box preference form helps your packing team choose among options already included in the product offer. This setup records an approved theme, recipient name, message, and substitution preference. It collects instructions without claiming to create a bundle or reserve individual component stock.
Setup tutorial · COLY · Updated 2026-09-07 · By Activory
Try the storefront example
Enter sample order details. Try each choice and use Phone width to check the form. This example shows the COLY fields; your theme supplies the product and purchase button.
This example uses COLY storefront code with sample data and the settings below. Your theme’s fonts and available width can change the result. Example links show their destination; purchase controls use a sample cart. Use the checks below to confirm the finished setup in your store.
Build it in COLY
The images below show the COLY form code with local sample data, captured on 2026-09-07. Shopify navigation and action bars are outside the cropped area.
1. Name the form
Open COLY → Forms and create a form. Enter Gift Box Preference Form in Form name. This name is for your admin. Set Status to Published when you are ready to save the finished setup.

Use a name that helps you identify the form in COLY. Select the image to view it at full size.
2. Add and configure the fields
Open the first field card. Choose its Field type, then enter the settings below. Select Add field for each further row. Keep the fields in the listed order. Leave Placeholder blank and Display fields based on quantity off for these examples. Keep Pricing rule at None, where shown, and option price adjustments off.
Open each field below to see its full settings and screenshot.
1. Box theme — Select field
- Set Field type to Select field and Label to Box theme.
- Select Is mandatory. Clear Hide by default.
- Leave Helper text blank for this example.
In Options, enter one choice per line:
Desk essentials
Relaxation
Celebration
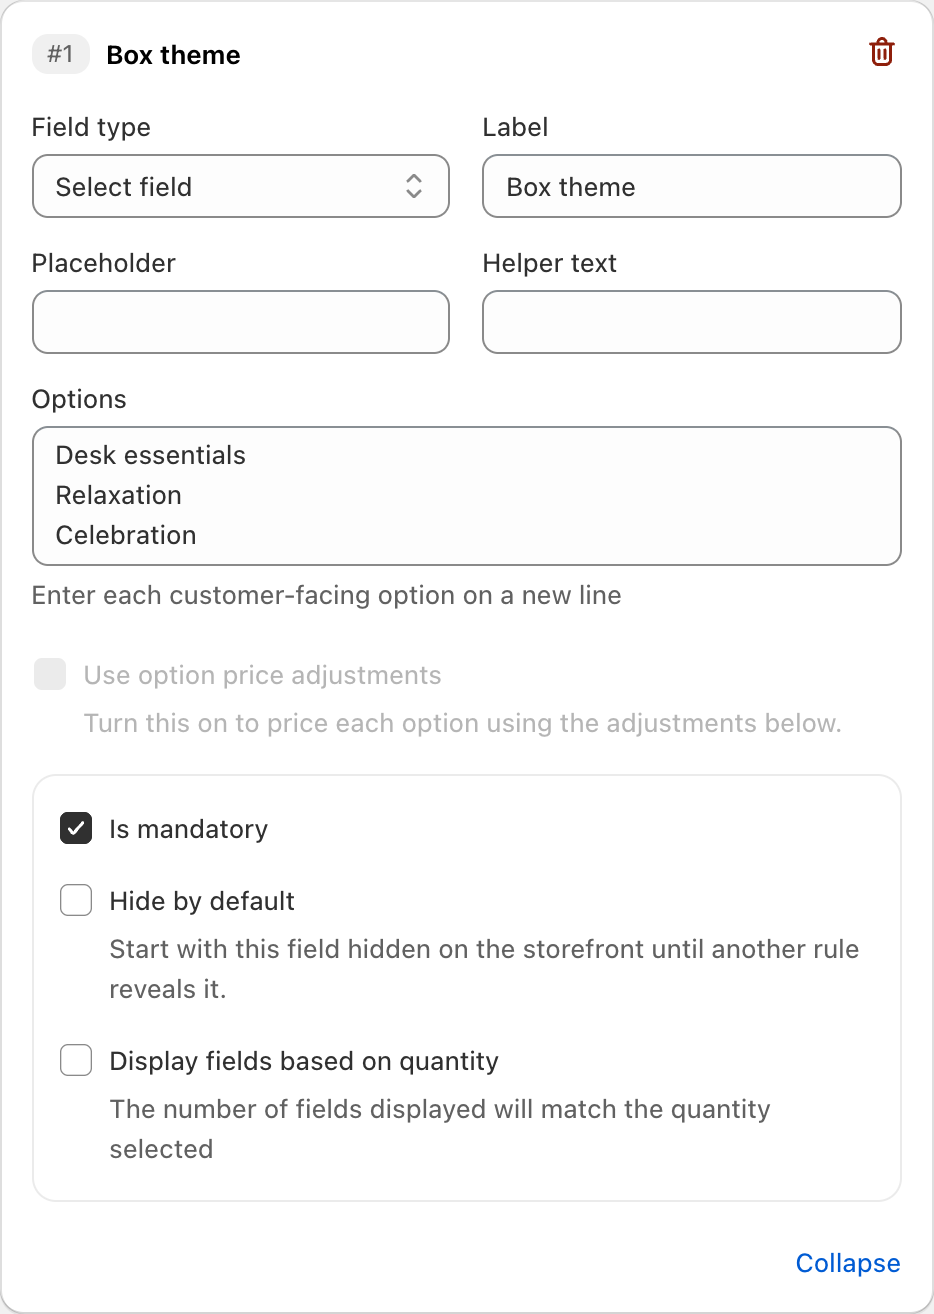
Match the label, helper text, and field settings shown here. Select the image to view it at full size.
2. Recipient name — Text field
- Set Field type to Text field and Label to Recipient name.
- Clear Is mandatory. Clear Hide by default.
- In Helper text, enter: Name for the card or packing label.
- Leave Minimum characters blank. Leave Maximum characters blank.
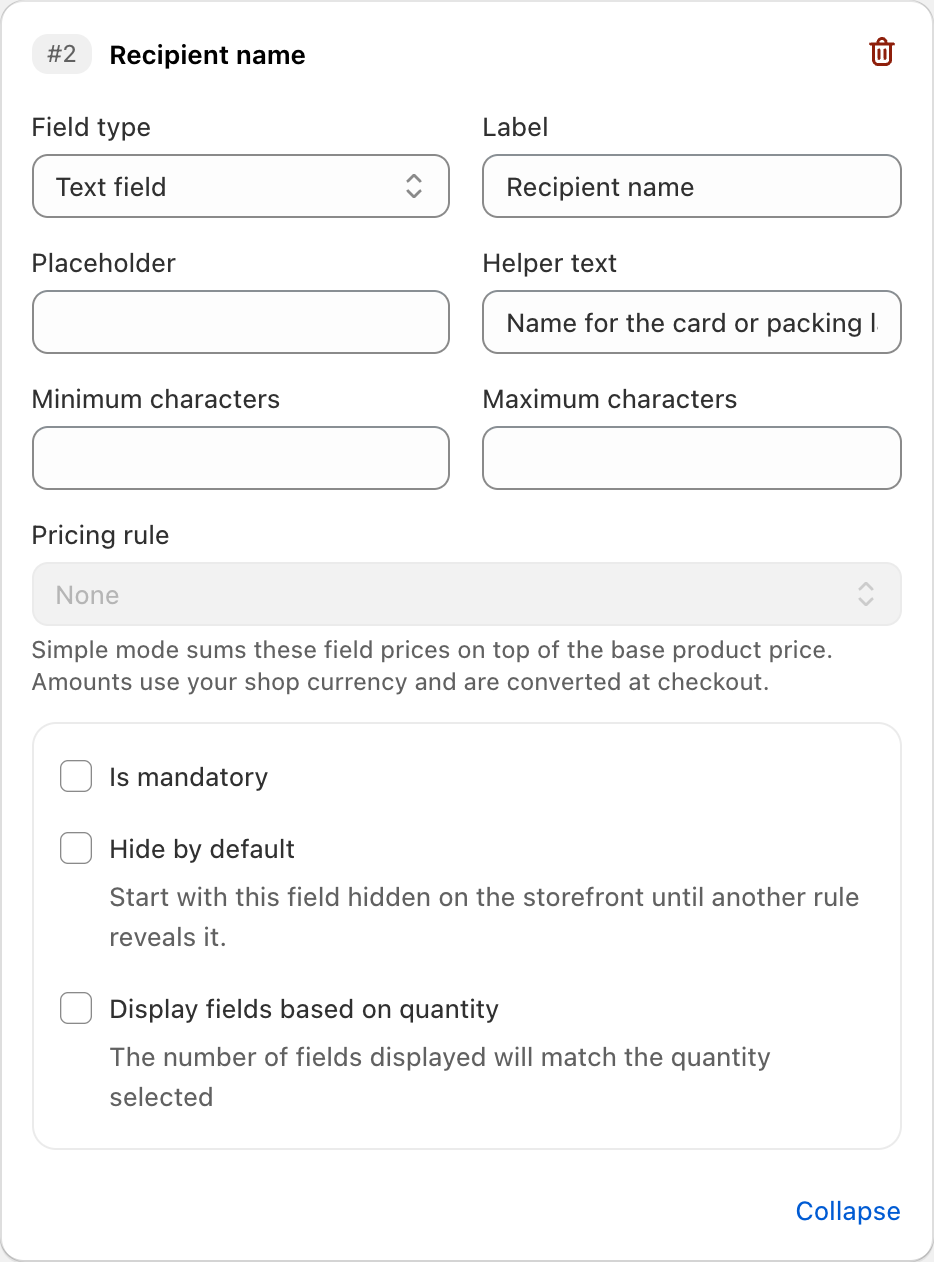
Match the label, helper text, and field settings shown here. Select the image to view it at full size.
3. Gift message — Textarea
- Set Field type to Textarea and Label to Gift message.
- Clear Is mandatory. Clear Hide by default.
- In Helper text, enter: Up to 250 characters.
- Leave Minimum characters blank. Set Maximum characters to 250.
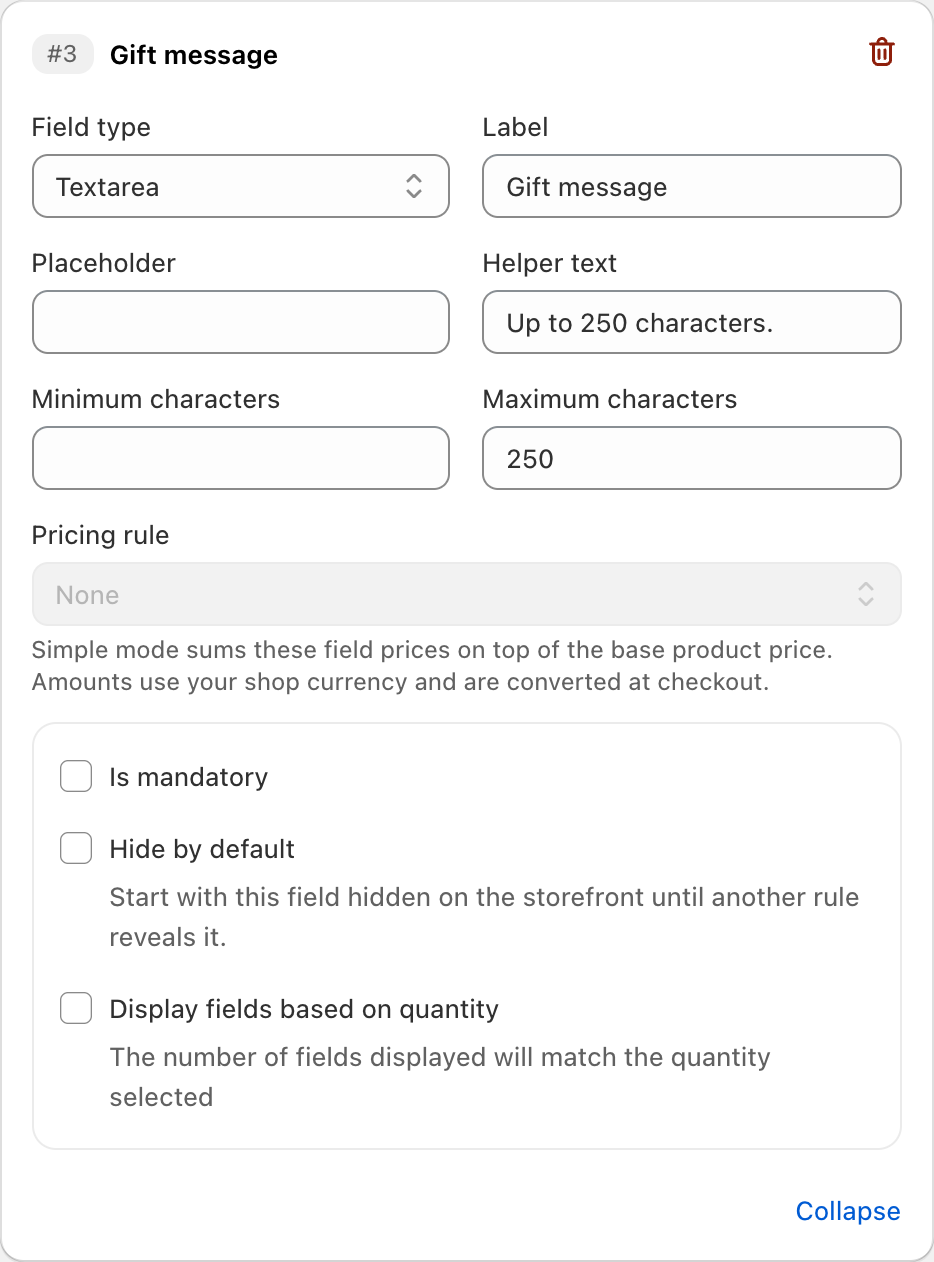
Match the label, helper text, and field settings shown here. Select the image to view it at full size.
4. Colour preference — Select field
- Set Field type to Select field and Label to Colour preference.
- Clear Is mandatory. Clear Hide by default.
- Leave Helper text blank for this example.
In Options, enter one choice per line:
No preference
Warm tones
Cool tones
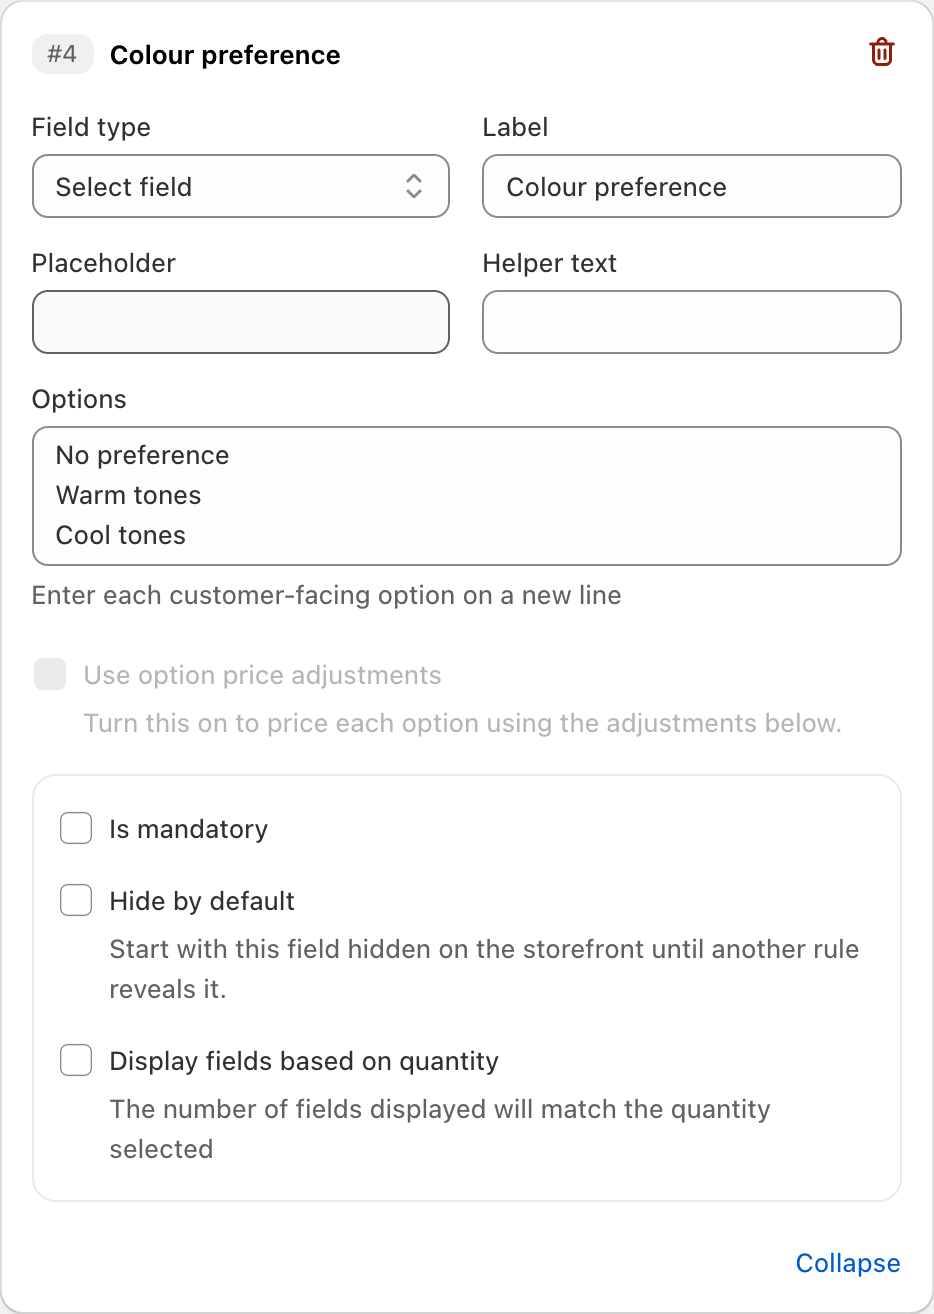
Match the label, helper text, and field settings shown here. Select the image to view it at full size.
5. Substitution preference — Radio button
- Set Field type to Radio button and Label to Substitution preference.
- Select Is mandatory. Clear Hide by default.
- Leave Helper text blank for this example.
In Options, enter one choice per line:
Follow stated policy
Contact first
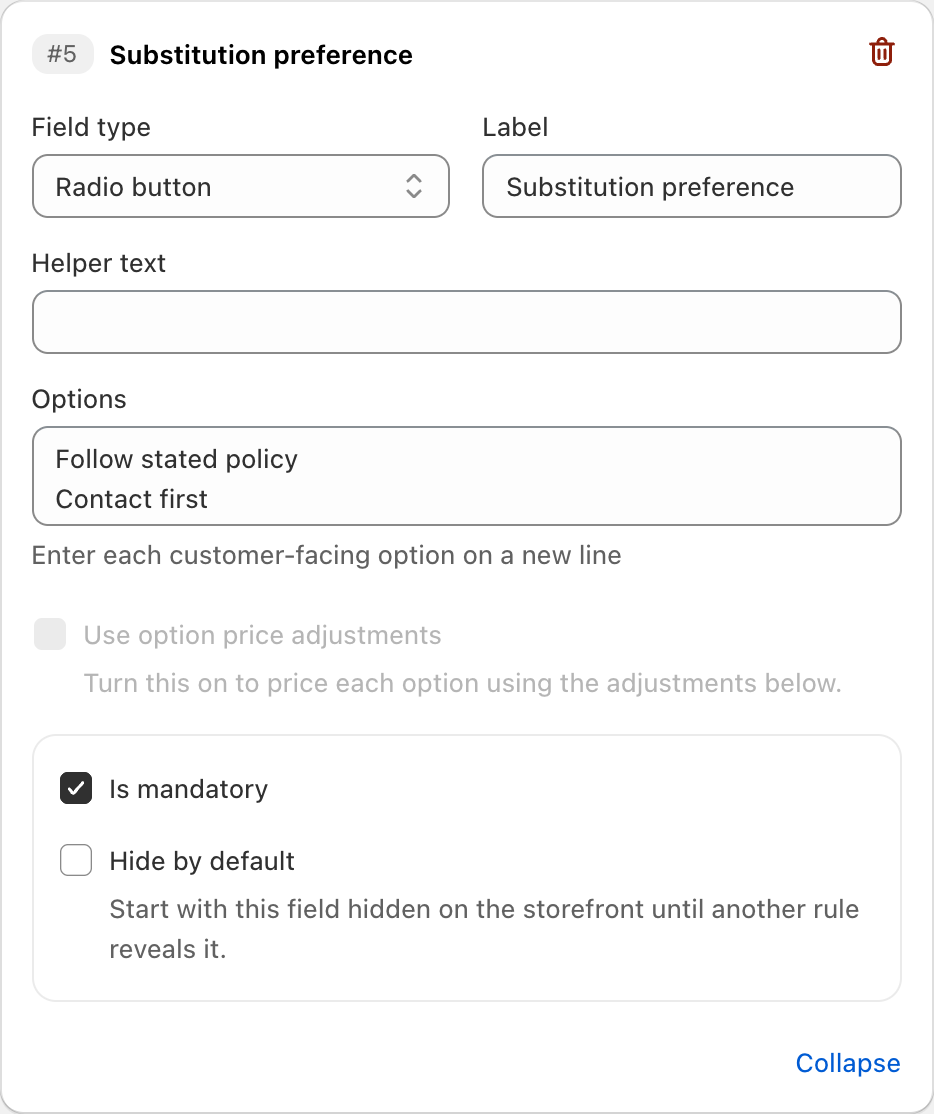
Match the label, helper text, and field settings shown here. Select the image to view it at full size.
6. Packing note — Textarea
- Set Field type to Textarea and Label to Packing note.
- Clear Is mandatory. Clear Hide by default.
- In Helper text, enter: Tell us about your packing request.
- Leave Minimum characters blank. Leave Maximum characters blank.
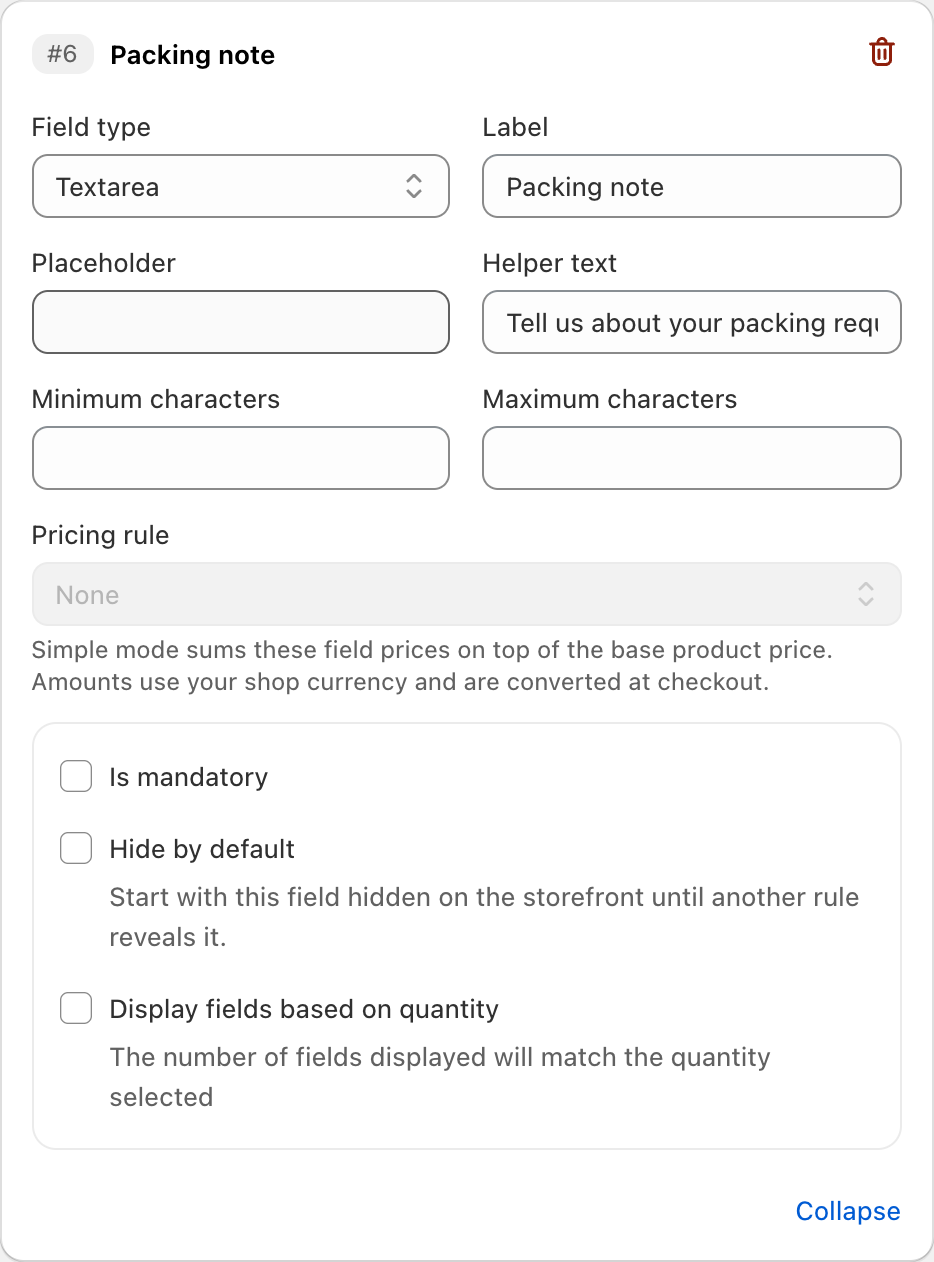
Match the label, helper text, and field settings shown here. Select the image to view it at full size.
3. Review the field list
Select Collapse in each field card to check the labels and order. Required fields must show Is mandatory when you open them. The helper text should tell customers what to enter.
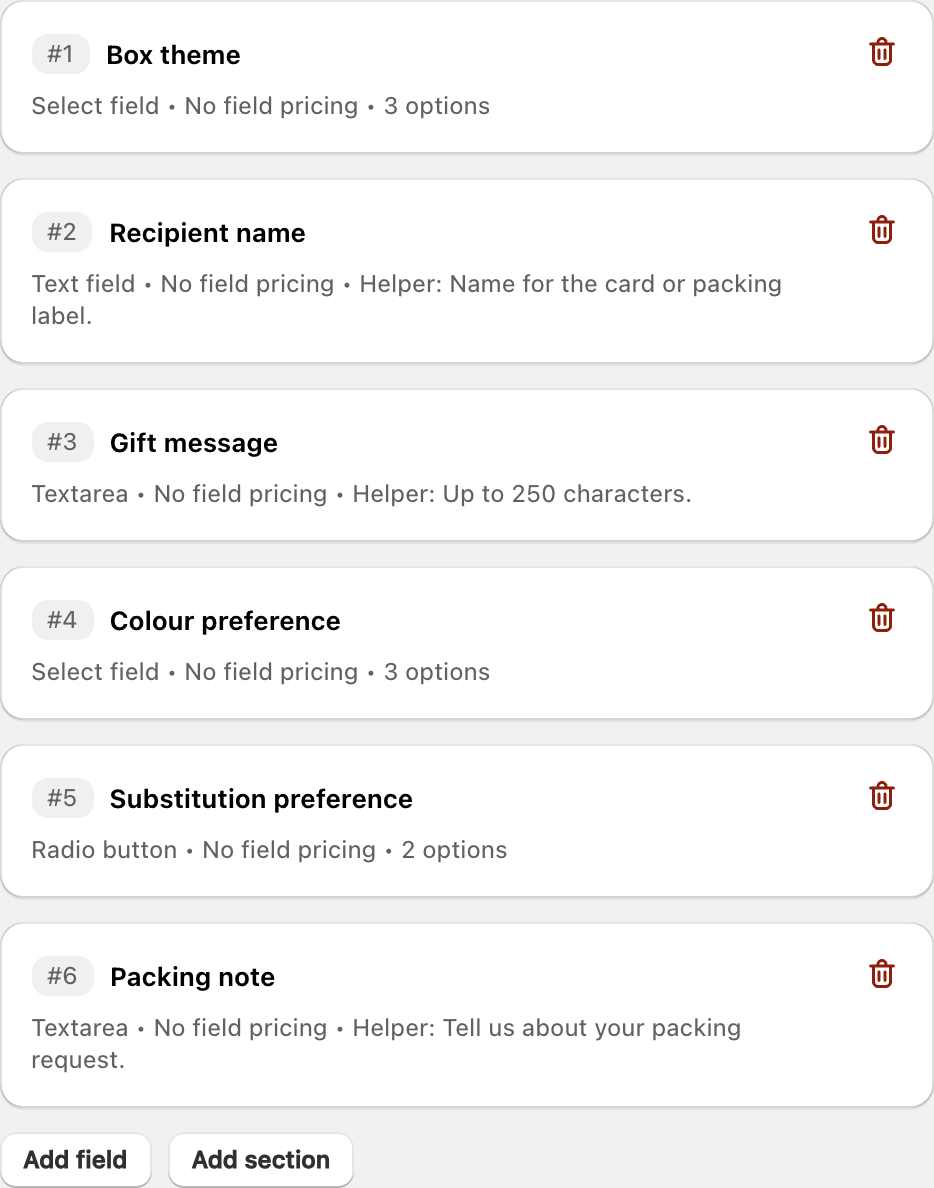
Check all 6 fields before you set the display rules. Select the image to view it at full size.
4. Choose product-page placement
Under Storefront placement, set Show this form on to Product pages. This matches the storefront example above.

Use Product pages to collect details for the item the customer is buying. Select the image to view it at full size.
5. Limit the form to your test products
In Shopify, add the product tag gift-box-preferences to your test product and save it. In COLY, open Display condition, set Attribute to Tagged with, then enter gift-box-preferences in Matches with and select the matching option. Only add this tag to products that should use this form.
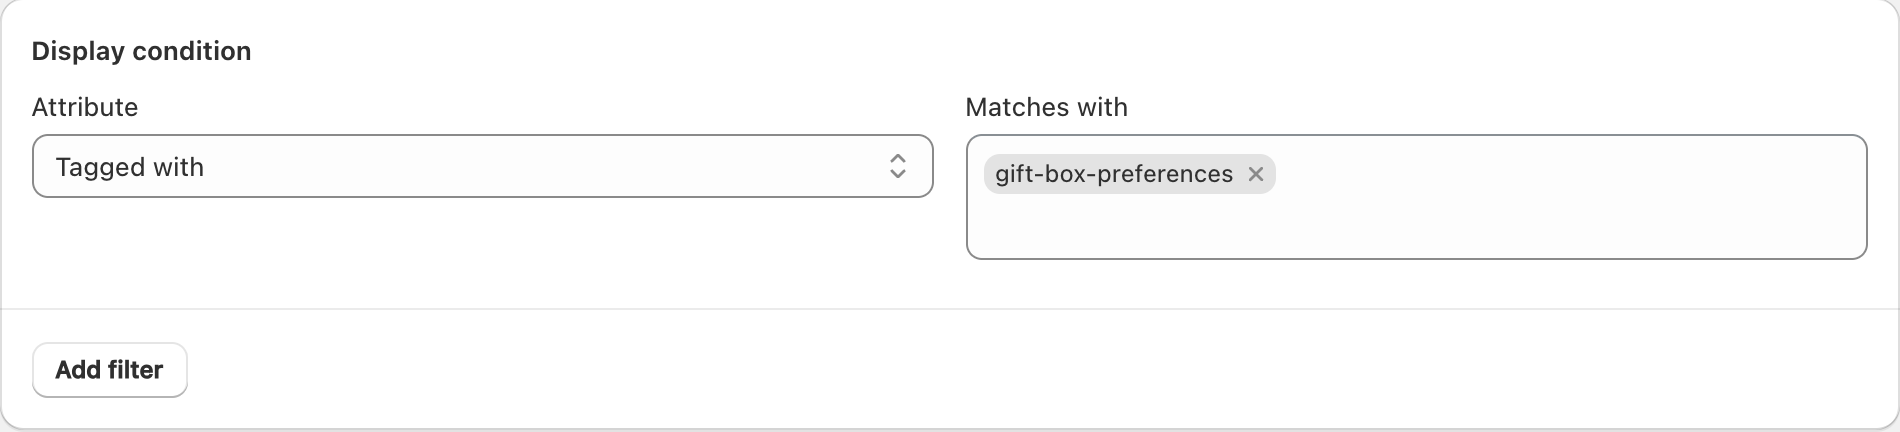
The same tag must be present on the Shopify product and in this form rule. Select the image to view it at full size.
6. Save and check the storefront
Check the form fields and rules, then select Save in COLY. Open the test product template in the Shopify theme editor. Add Coly - Form fields near the purchase controls, keep the default field design for this example, and save the theme.
Open the tagged product in the storefront and enter test details. Add the item to the cart and check its submitted details. Complete the finished setup checks before you use the form on products for sale. See the COLY setup guide for the Shopify theme controls.
Example settings
- Box theme: Required; choices: Desk essentials; Relaxation; Celebration.
- Recipient name: Optional. Helper text: “Name for the card or packing label.”
- Gift message: Optional; maximum 250 characters. Helper text: “Up to 250 characters.”
- Colour preference: Optional; choices: No preference; Warm tones; Cool tones.
- Substitution preference: Required; choices: Follow stated policy; Contact first.
- Packing note: Optional. Helper text: “Tell us about your packing request.”
Sample data and content
Use these values for a test. Replace them with checked product data, published destinations, and offers that your store can supply.
| Field label | Field type | Required setting | Configuration note |
|---|---|---|---|
| Box theme | Select | Required | Desk essentials; Relaxation; Celebration |
| Recipient name | Text | Optional | Used on the card or packing label |
| Gift message | Textarea | Optional | Use the printed card limit |
| Colour preference | Select | Optional | No preference; Warm tones; Cool tones |
| Substitution preference | Radio | Required | Follow stated policy; Contact first |
| Packing note | Textarea | Optional | Requests remain subject to the product offer |
Can a gift-box preference change the price or included products?
Use fixed options when the customer chooses from a known set. Keep an optional note for clarification, but do not let that note silently expand the offer. If a preference affects price or requires a separate stocked product, use the appropriate product and pricing setup before accepting orders.
- Define the contents and choices included in each gift-box product. Match every form option to something your team can supply.
- Add theme and substitution fields with plain helper text. Keep the message field separate from the packing note.
- Explain how your team handles unavailable components and contact-first requests in the product description.
- Test two box products with different recipients and verify that their instructions remain separate in the cart and order.
Read the COLY setup guide for the full app controls and placement options.
Check the finished setup
- Confirm that a customer cannot interpret a theme preference as a guaranteed list of extra products.
- Check that optional colour preferences do not block a no-preference purchase.
- Read the order with your packing team and confirm the substitution instruction is easy to find.
Common mistakes
- Do not describe this form plan as a stock-aware bundle builder.
- Do not use a free-text note to collect an unpriced custom service that the offer does not include.
Supported use
This plan collects product order details. It does not configure fees, stock, appointments, or shipping services. Check plan access for conditional fields. Test each purchase route in your theme and verify that the intended details reach the order before you accept custom work.
COLY features, current app plans, and COLY conditional logic explain the supported setup.
Related tutorials
- Gift Message Form Setup Guide
- Flower Order Details Form Setup Guide
- Custom Print Order Brief Setup Guide
Browse all COLY tutorials. Read how the examples are made or report a correction.