

Backpack Specification Table Setup Guide
A backpack specification table should show capacity, external dimensions, usable laptop compartment dimensions, and empty weight. These fields answer different fit and carrying questions. This TableFlow tutorial places size-dependent facts on variants so each bag option can show its own measurements.
Setup tutorial · TableFlow · Updated 2026-09-07 · By Activory
Try the storefront example
Select the three sample products. The first shows all six rows. The second has two empty fields, so those rows disappear. The third has no values, so the whole table disappears. You can also choose Missing variant values inside the example to hide only the selected variant’s missing rows.
The first product option shows all six specification rows.
Hide empty fields in your store
In the theme editor, open the TableFlow app embed and leave Empty value placeholder blank. These are sample products.
This example uses TableFlow storefront code with sample data and the settings below. Your theme’s fonts and available width can change the result. Example links show their destination; purchase controls use a sample cart. Use the checks below to confirm the finished setup in your store.
Build it in TableFlow
The images below show the TableFlow form code with local sample data, captured on 2026-09-07. Shopify navigation and action bars are outside the cropped area.
1. Prepare the metafields
In Shopify, open Settings → Custom data. Create the six definitions in Sample data and content as Single line text. Use Variants for Capacity, Bag height, Bag width, Bag depth, Laptop compartment, and Empty weight. Reuse an existing definition if it stores the same information.
Open your test product and enter the sample values in the variant metafields. Add the product tag backpack-specifications to this test product, then save. We will use this tag to control where the table appears. For images of these Shopify controls, see the product metafield guide and variant metafield guide.
2. Name the specification table
In TableFlow, create a specification table. Enter Backpack Specification Table in Table name. This name is for your admin. Leave Table ranking at 1st. Set Status to Published when you are ready to save the finished setup.
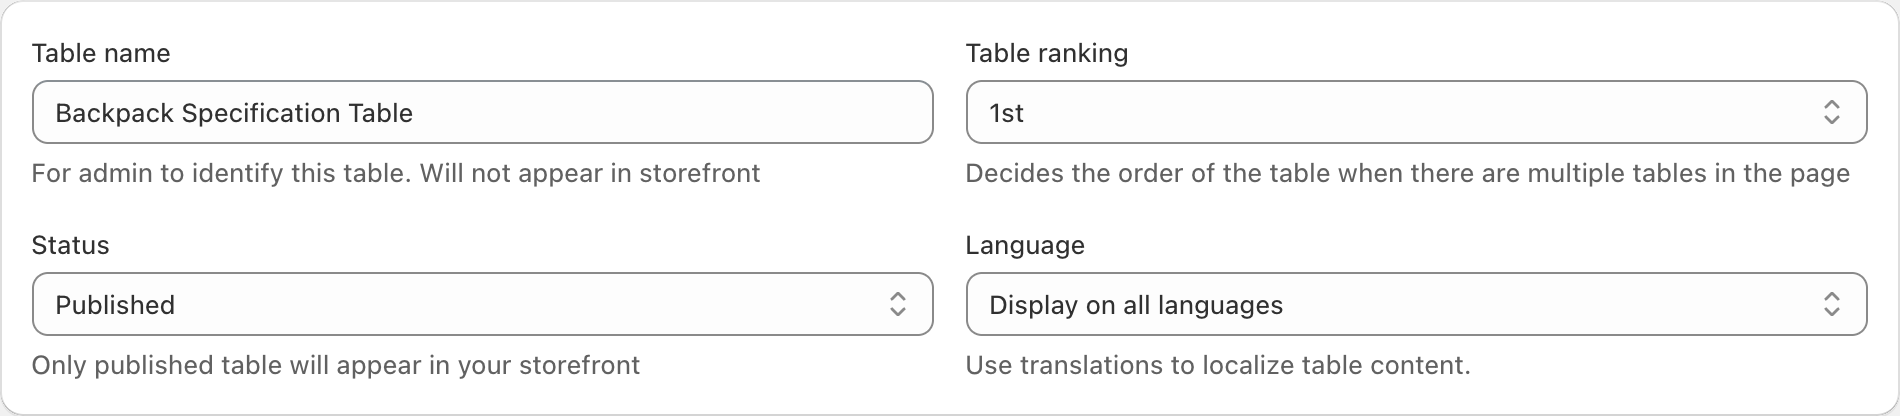
Table name identifies the table in TableFlow. The section title in the next step is the heading that shoppers see. Select the image to view it at full size.
3. Add the first row
Under Table content, enter Specifications in Section title. In the first row, enter Capacity in Label and select Advance in Source. Then select Search metafields, above the Advance value field.
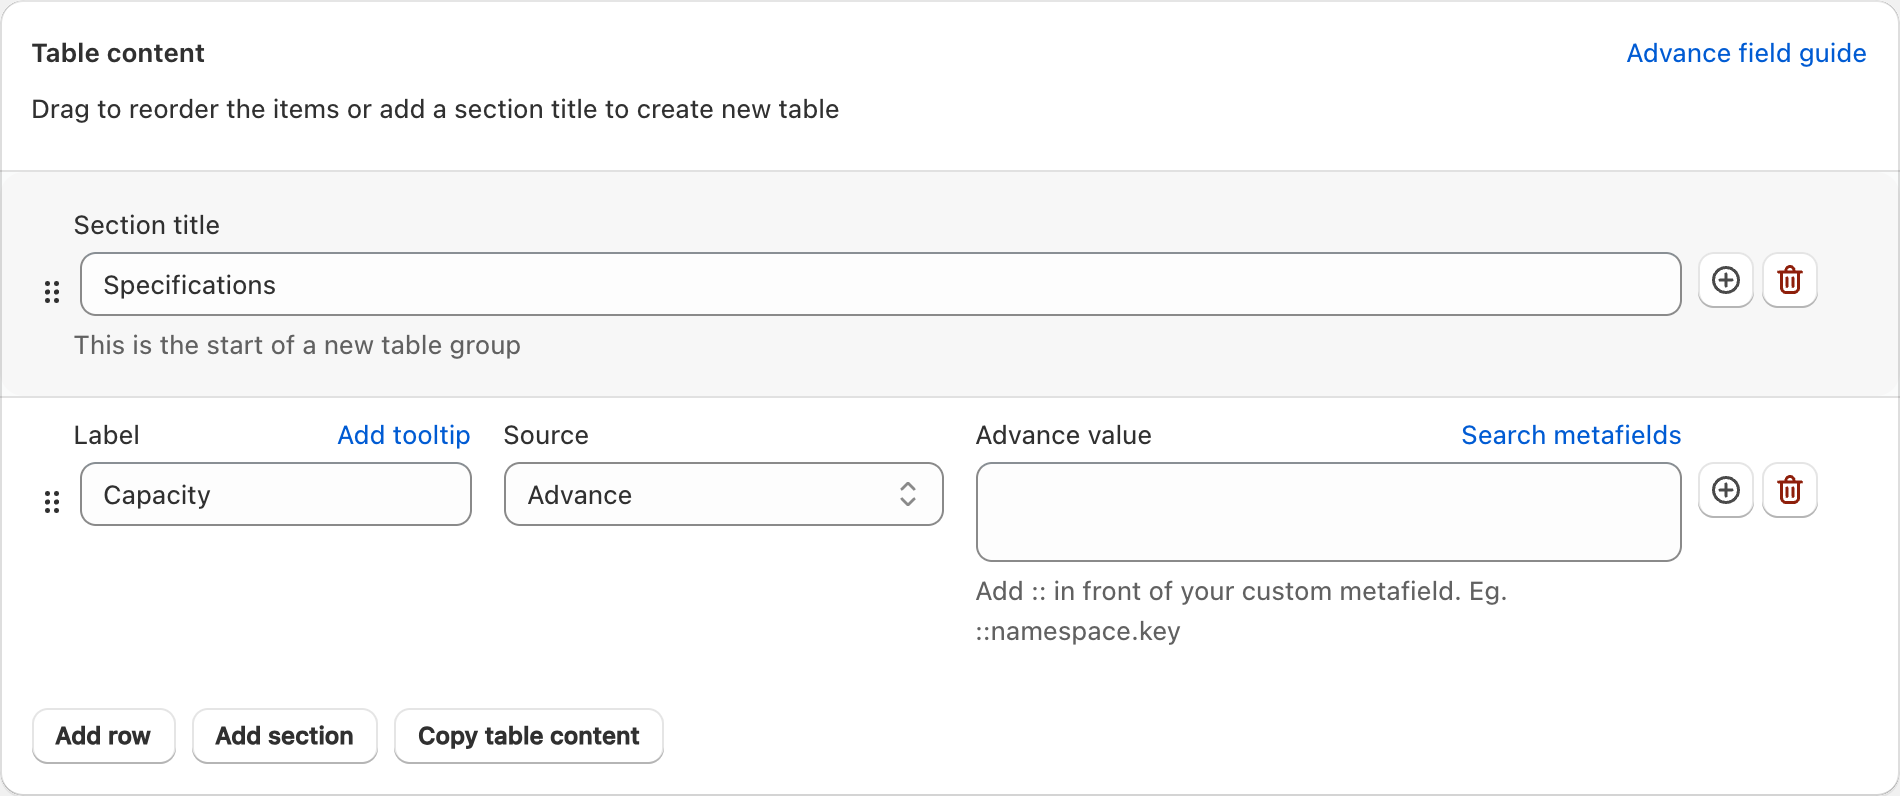
Select Search metafields to connect this row to its variant value. Select the image to view it at full size.
4. Select the value and complete the six rows
In Search metafields, enter custom.bag_capacity. Select Capacity with the Variant - single_line_text_field description. Select Insert in the selection window. The Advance value field will contain ::custom.bag_capacity.
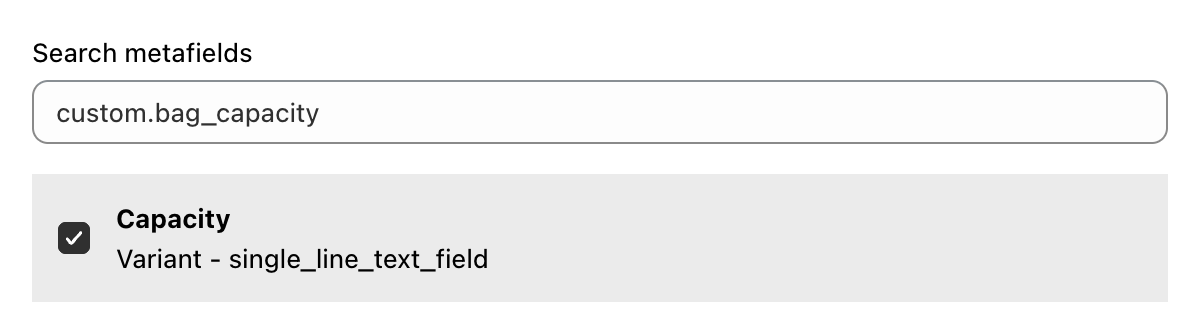
This image shows the search field and selected result. The Insert button is in the Shopify action bar outside this crop. Select the image to view it at full size.
Select Add row and repeat this process for the other five rows in Sample data and content. Keep Source set to Advance. Match the result to the Scope column for each row. A Product result supplies a value shared by the product. A Variant result supplies a value for the selected option. The stored product or variant value supplies the storefront text; do not type the sample measurement into Advance value.
Show the completed six-row setup
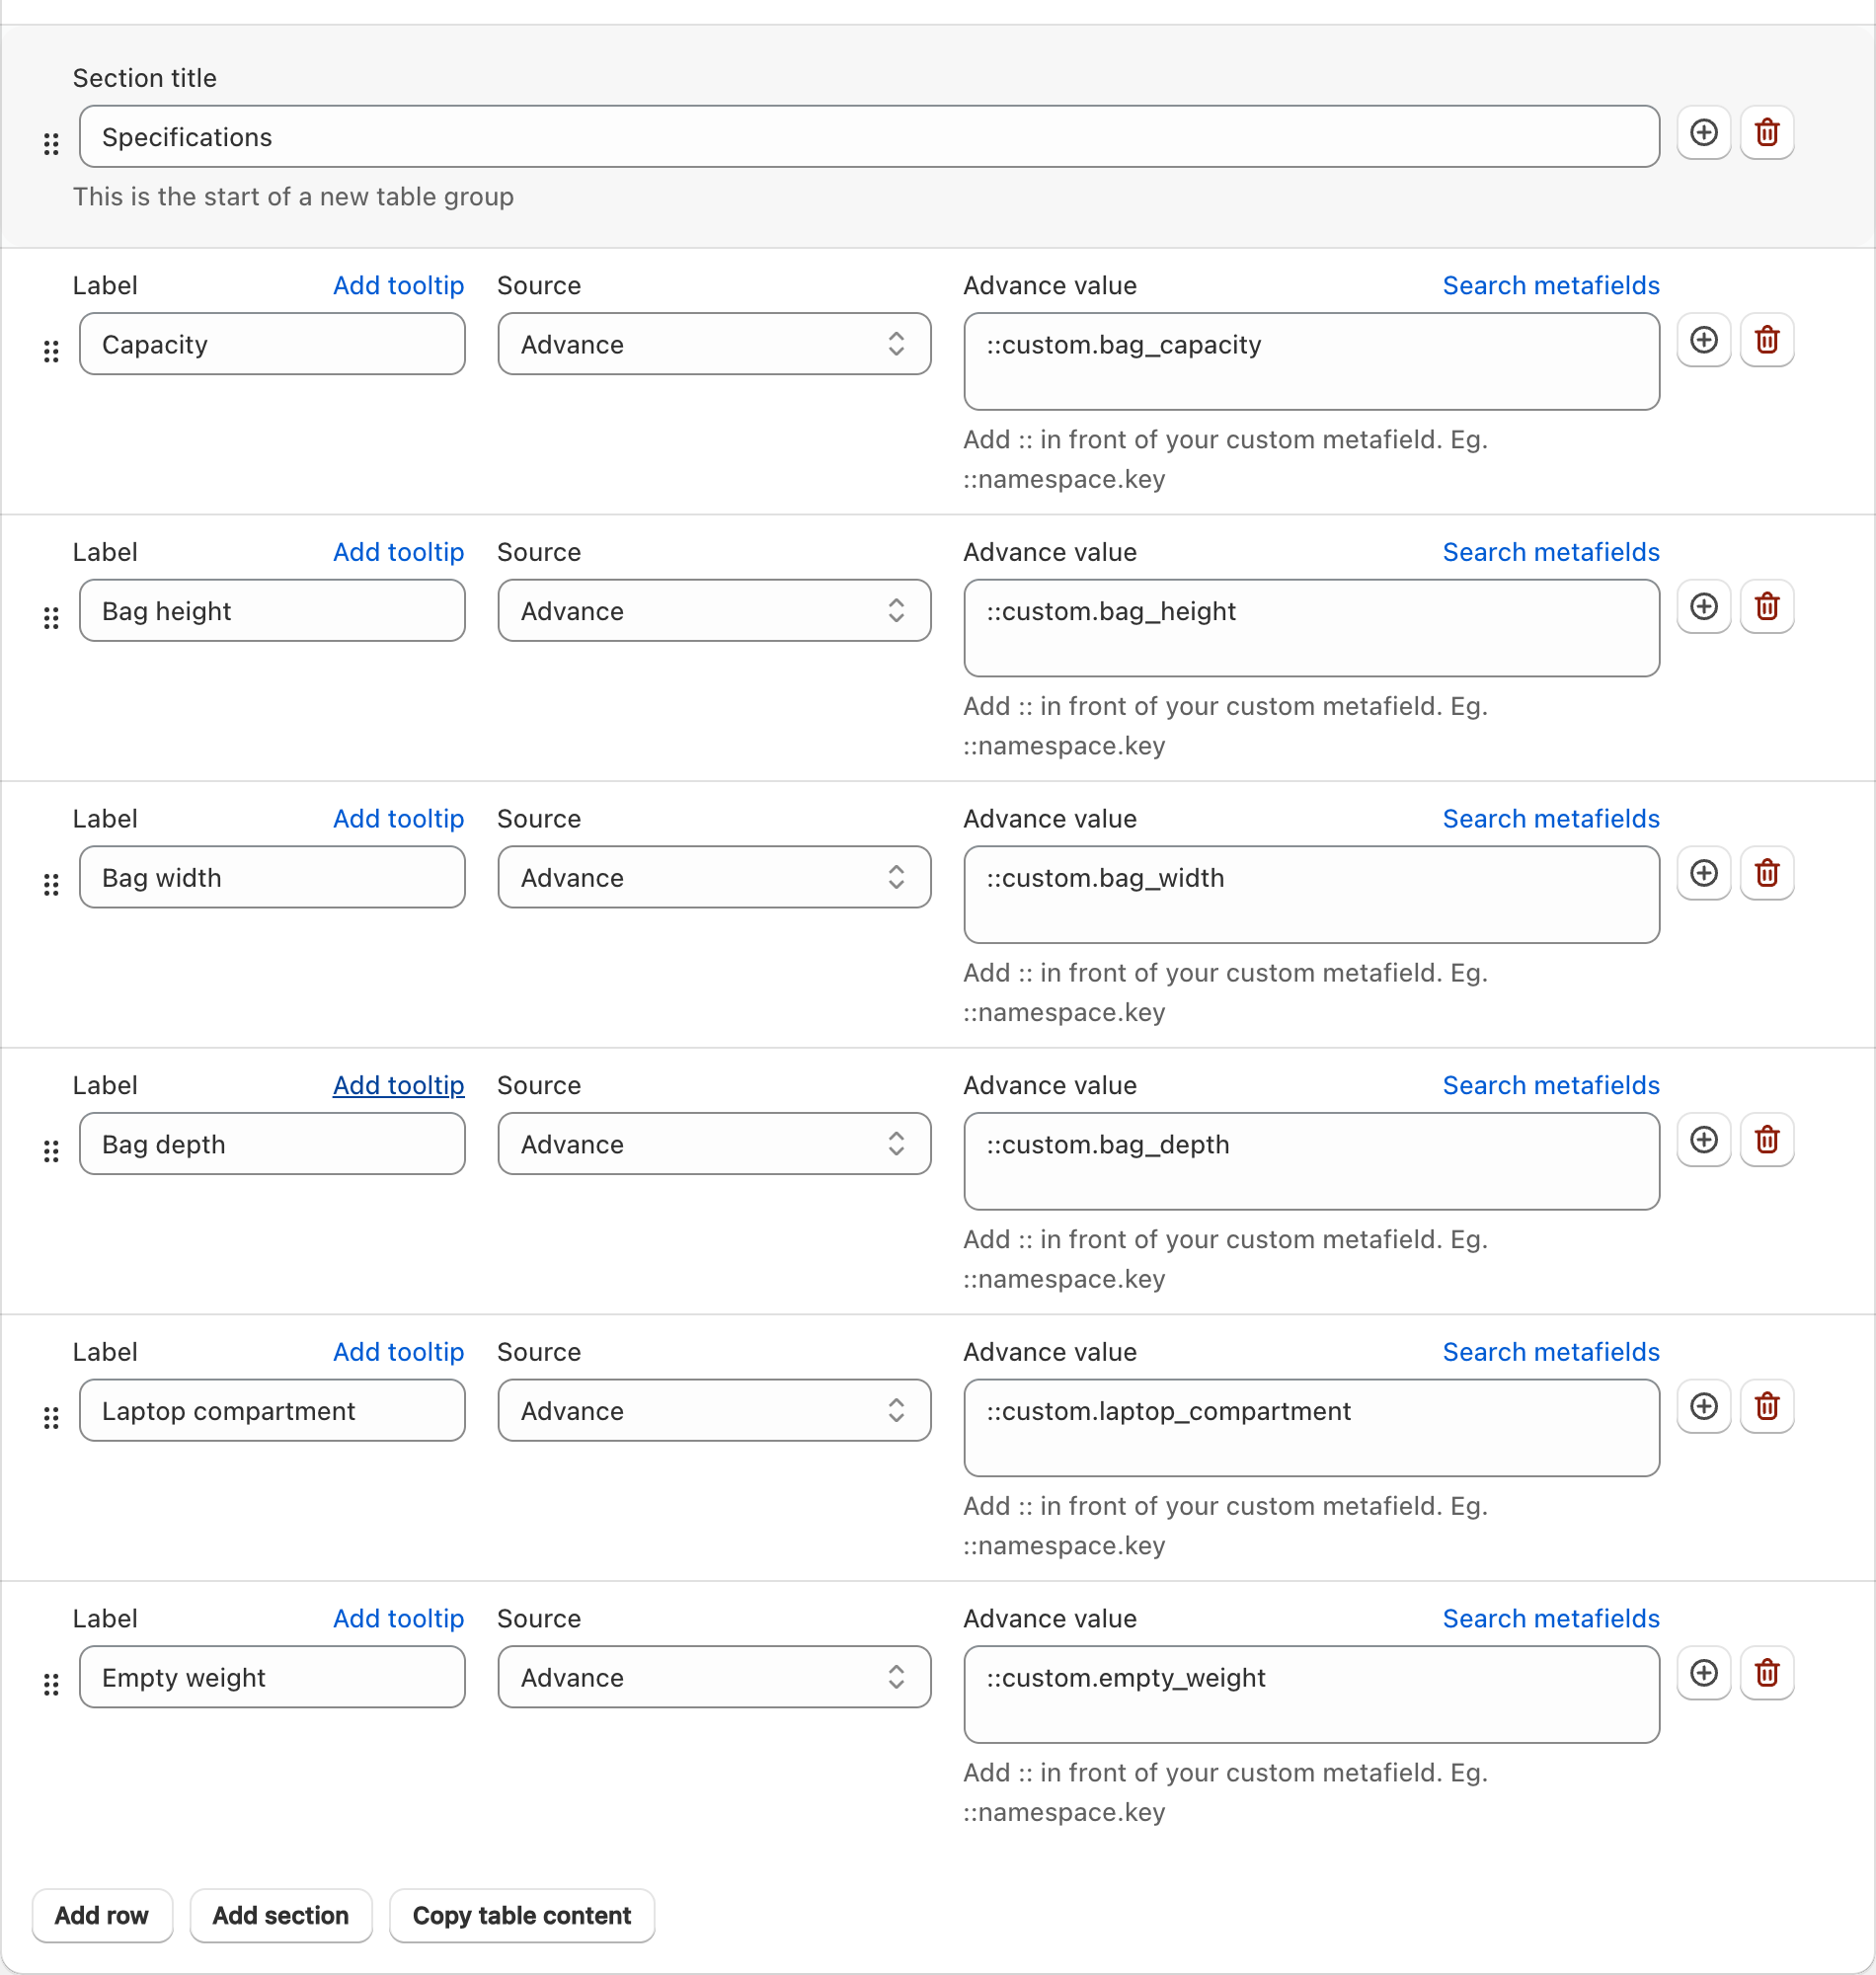
Check the row order and metafield keys against this completed example. Select the image to view it at full size.
5. Choose which products show the table
Under Display condition, set Attribute to Tagged with and Condition to Match any. In Values, enter backpack-specifications and select the matching option to add the tag. Only apply this tag to products that should use this specification table. Use your test product first.
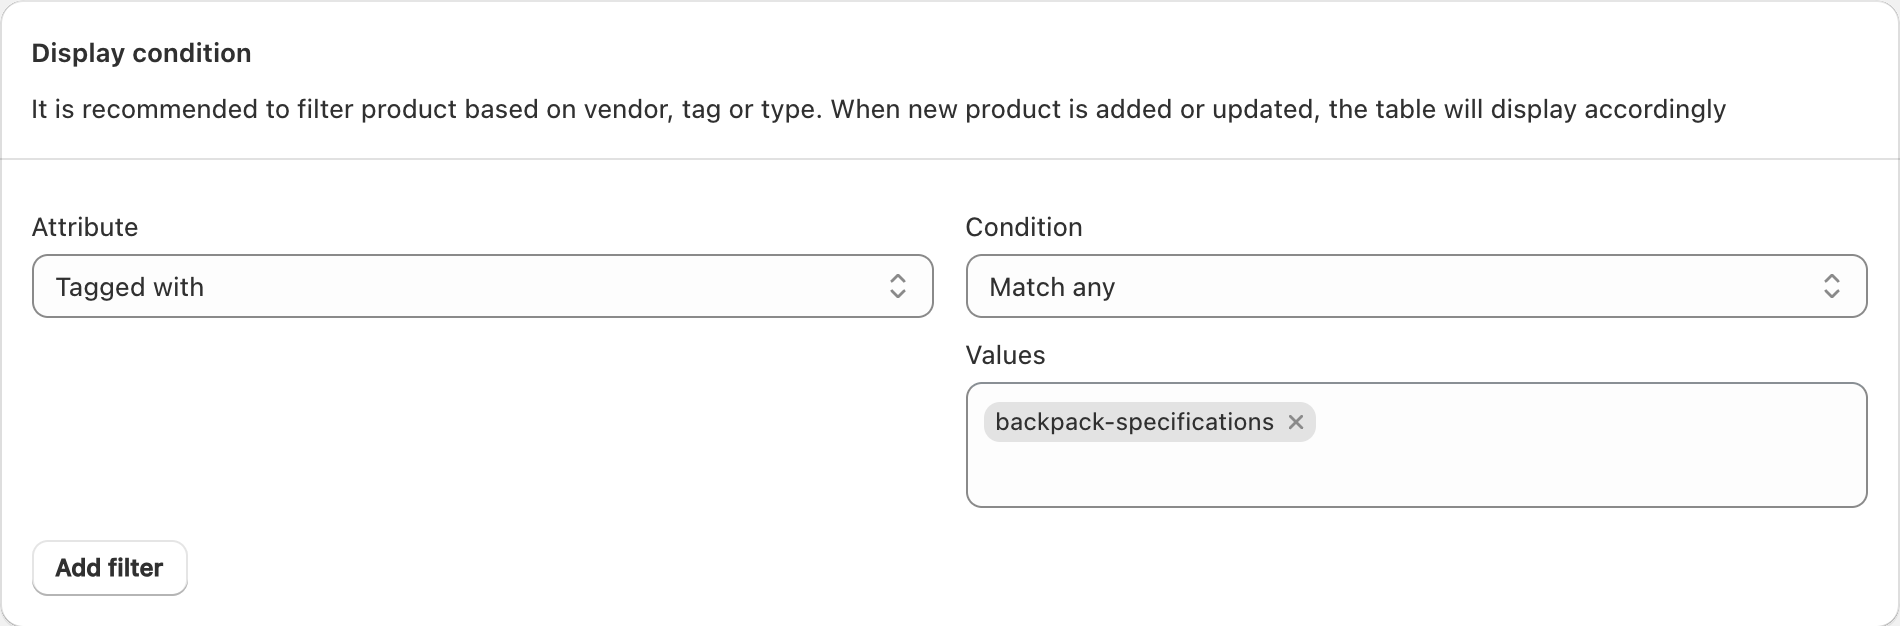
The tag must also be present on the Shopify product. This keeps the table limited to the intended products. Select the image to view it at full size.
6. Select the table location and save
Under Table locations, select Location 1. Leave the other locations clear for this example. Check the six rows, display condition, and Published status, then select Save in TableFlow.

Use the same location number in the TableFlow app block in the next step. Select the image to view it at full size.
7. Add the table to the product template
Open the product template in the Shopify theme editor. Enable the TableFlow app embed. Clear Empty value placeholder so it is blank. This makes TableFlow hide rows with missing values and hide the whole table if every row is empty.
Add the TableFlow - Specification app block and select table location 1. Match the example settings, then save the theme. Open the tagged test product in your storefront and change its variant. Check the specification values, then clear one test value to confirm that its row disappears.
Example settings
- This example uses 18 px title text, 14 px row text, 40% label width, row borders, and 5 px cell padding. Empty value placeholder is blank. Hiding starts after the storefront script loads; entering a dash in this setting keeps missing rows visible instead.
- The custom-data definitions, scopes, and values below produce the example. The second sample variant has no variant metafield values.
- City backpack: all six fields use the sample values below.
- Daypack: leave Laptop compartment and Empty weight empty. Other changes: Capacity = 16 L.
- Travel backpack: leave all six mapped metafields empty. The table and its heading are hidden.
Sample data and content
Use these values for a test. Replace them with checked product data, published destinations, and offers that your store can supply.
| Detail | Suggested metafield key | Scope | Metafield type | Example value |
|---|---|---|---|---|
| Capacity | custom.bag_capacity | Variant | Single line text | 20 L |
| Bag height | custom.bag_height | Variant | Single line text | 44 cm |
| Bag width | custom.bag_width | Variant | Single line text | 29 cm |
| Bag depth | custom.bag_depth | Variant | Single line text | 16 cm |
| Laptop compartment | custom.laptop_compartment | Variant | Single line text | 33 x 23 x 2 cm usable space |
| Empty weight | custom.empty_weight | Variant | Single line text | 720 g |
Does a laptop screen size prove it fits in a backpack?
A laptop screen size does not define the outside dimensions of the computer. Publish the usable compartment measurement when you have it, and tell customers to compare their device dimensions. Keep empty bag weight separate from packed shipping weight. Capacity and external dimensions answer different questions.
- Measure the usable device compartment with its closure in the normal position. Record the measuring method in your source notes.
- Store size-dependent capacity, dimensions, and weight on variants. Keep common fabric facts on the product.
- Put the device compartment beside the external dimensions in TableFlow so the two measurements are easy to distinguish.
- Inspect the table for the smallest and largest bag. Check any size label printed in the product images.
Read the TableFlow setup guide for the full app controls and placement options. Use the variant metafield guide for rows that change with an option.
Check the finished setup
- Try a device with known outside dimensions before making a device-fit claim.
- Confirm that the empty weight excludes removable extras unless the label says they are included.
- Read the table on mobile and make sure the three compartment dimensions stay together.
Common mistakes
- Do not treat a litre capacity as a promise that a particular laptop will fit.
- Do not present external bag dimensions as usable internal space.
Supported use
TableFlow displays the values you supply. It does not measure products or verify supplier claims. Use product fields for shared facts and variant fields for facts that change with the selected option. Confirm the app embed and table placement in your theme.
TableFlow features, current app plans, and Shopify metafield types and accepted values explain the supported setup.
Related tutorials
- Outdoor Shelter Specification Table Setup Guide
- Apparel Material and Care Table Setup Guide
- Bottle and Tumbler Specification Setup Guide
Browse all TableFlow tutorials. Read how the examples are made or report a correction.