Fast Track: Launching Your First Reward Progress Bar
Get your first upsell progress bar live in minutes and start boosting your average order value today.
Overview
BlueCart helps you increase average order value by showing customers how close they are to unlocking rewards like free shipping, discounts, or free gifts. When customers see a visual progress bar showing they're "$15 away from free shipping," they're motivated to add more to their cart.
In this guide, you'll create a simple free shipping progress bar that displays on your product and cart pages.
Create Your First Campaign
A campaign is a set of goals and display settings that work together. You might have one campaign for free shipping and another for tiered discounts.
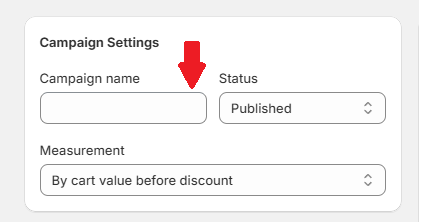
To create your first campaign:
- Open the BlueCart app from your Shopify admin
- Click the Create Campaign button
- Give your campaign a descriptive name (e.g., "Free Shipping Progress Bar")
Your campaign is now ready to configure with goals and styling.
Set Your First Goal
Goals (also called milestones) are the thresholds customers work toward. The most common goal is a free shipping threshold.
To set up a free shipping goal:
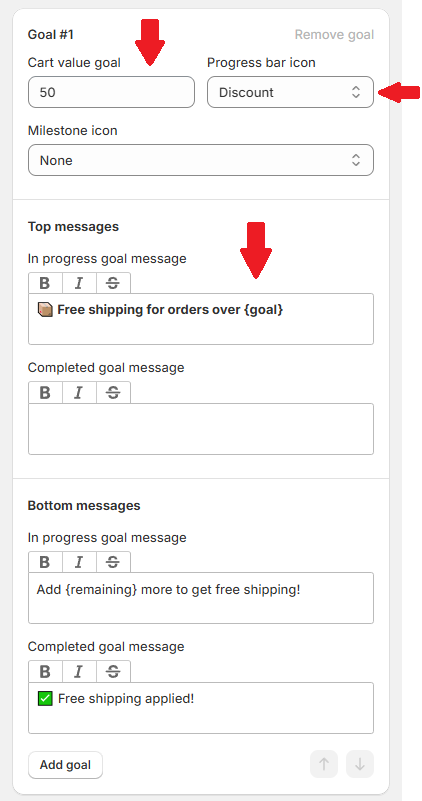
- In your campaign, find the Goals section
- Click Add Goal to create your first milestone
- Choose how progress is measured:
- By cart value before discount — Most common option
- By cart value after discount — Counts value after discounts applied
- By cart quantity — Based on number of items in cart
- Set the goal value (e.g., $50)
- Configure your messages:
- Progress message:
Spend {remaining} more for FREE SHIPPING! - Completed message:
You've unlocked FREE SHIPPING!
- Progress message:
- Optionally select a milestone icon (gift, truck, discount, plane, or ship)
The {remaining} variable automatically calculates how much more the customer needs to spend and formats it in their currency.
You can add unlimited milestones to create a tiered rewards system. For example: $50 for free shipping, $75 for a free gift, $100 for 10% off.
Choose Display Style
BlueCart offers 6 display layouts to match your store's design, with separate options for desktop and mobile.
To select a layout:
- Navigate to the Display options tab in your campaign
- Select your preferred layout from the Desktop view dropdown:
- Progress bar + checklist — Shows the bar with all milestones listed below
- Checklist only — Milestones displayed as a list without the progress bar
- Progress bar only — Clean, minimal progress indicator
- Progress bar with 1 goal — Shows bar with only the next milestone
- Progress bar with 1 goal + completed checklist — Shows completed milestones checked off
- Progress bar with 1 goal + all checklist — Shows all milestones with current highlighted
- Select your Mobile view layout (can be different from desktop)
- Check the Live Preview panel on the right to see your selection in action

Next, go to the Designs tab to customize colors:
- Progress bar fill and background colors
- Milestone icons, borders, and backgrounds
- Message text colors
- Container styling (sharp, small rounded, or medium rounded corners)
- Animated progress bar fills and milestone sizes (12-120px)
Add to Your Store
Once your campaign is configured, you need to add it to your store pages. BlueCart offers two integration methods.
Method 1: Theme App Block (Recommended)
To add the BlueCart block:
- In your campaign settings, copy the Campaign ID
- Open your Shopify admin and go to Online Store → Themes
- Click Customize on your active theme
- Navigate to your Product page, Collection page, or Home page
- Click Add block and search for BlueCart - Progress Bar in the Apps section
- Select the block and paste your Campaign ID
- Adjust margins (top, bottom, left/right) as needed
- Position the block where you want it to appear

Method 2: Shortcode (For Cart Drawers)
For cart drawers or custom templates, use the shortcode method:
- Enable BlueCart - Shortcode in your theme's App Embeds
- Add this code to your cart drawer template:
<div data-id="YOUR_CAMPAIGN_ID" class="bcpb-bluecart"></div> - Replace
YOUR_CAMPAIGN_IDwith your actual Campaign ID
You can add multiple Campaign IDs separated by commas to show different campaigns based on display conditions.
Test and Publish
Before going live, preview your progress bar to ensure everything works correctly.
To test your campaign:
- Click Preview in your theme editor to see the progress bar on your storefront
- Add products to your cart and verify:
- The progress bar updates as you add items
- Messages display correctly
- Colors and styling look right
- Test the completed state by meeting your goal threshold
- Once satisfied, click Save in the theme editor
- In BlueCart, set your campaign status to Published

Your progress bar is now live and working to increase your average order value.
Next Steps
Now that your first campaign is live, consider:
- Adding multiple goals for tiered rewards
- Setting up different campaigns for different customer segments
- Exploring multi-currency settings for international customers